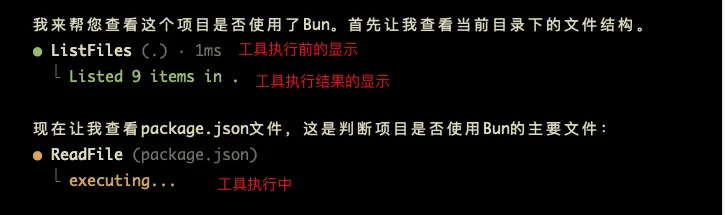
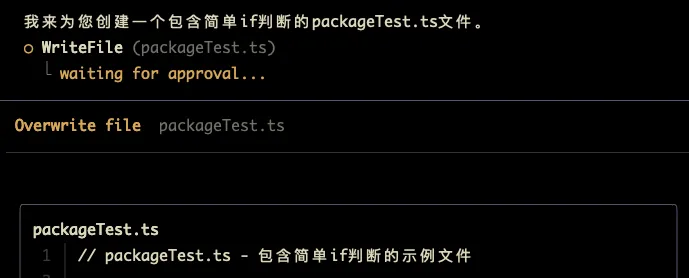
Tool Dispatch and Permission Module Development
The core of tool permission mode development is designing Agent modes to determine whether tools need user approval before execution. This extends into tool dispatch implementation and allowList mechanisms.
Complete development approach:
- Tool permission verification methods and terminal approval panels
- Tool execution dispatch
- AllowList mechanism
References: Gemini-cli, OpenCode, Kode, ClaudeCode
1. Tool Dispatch Flow Design
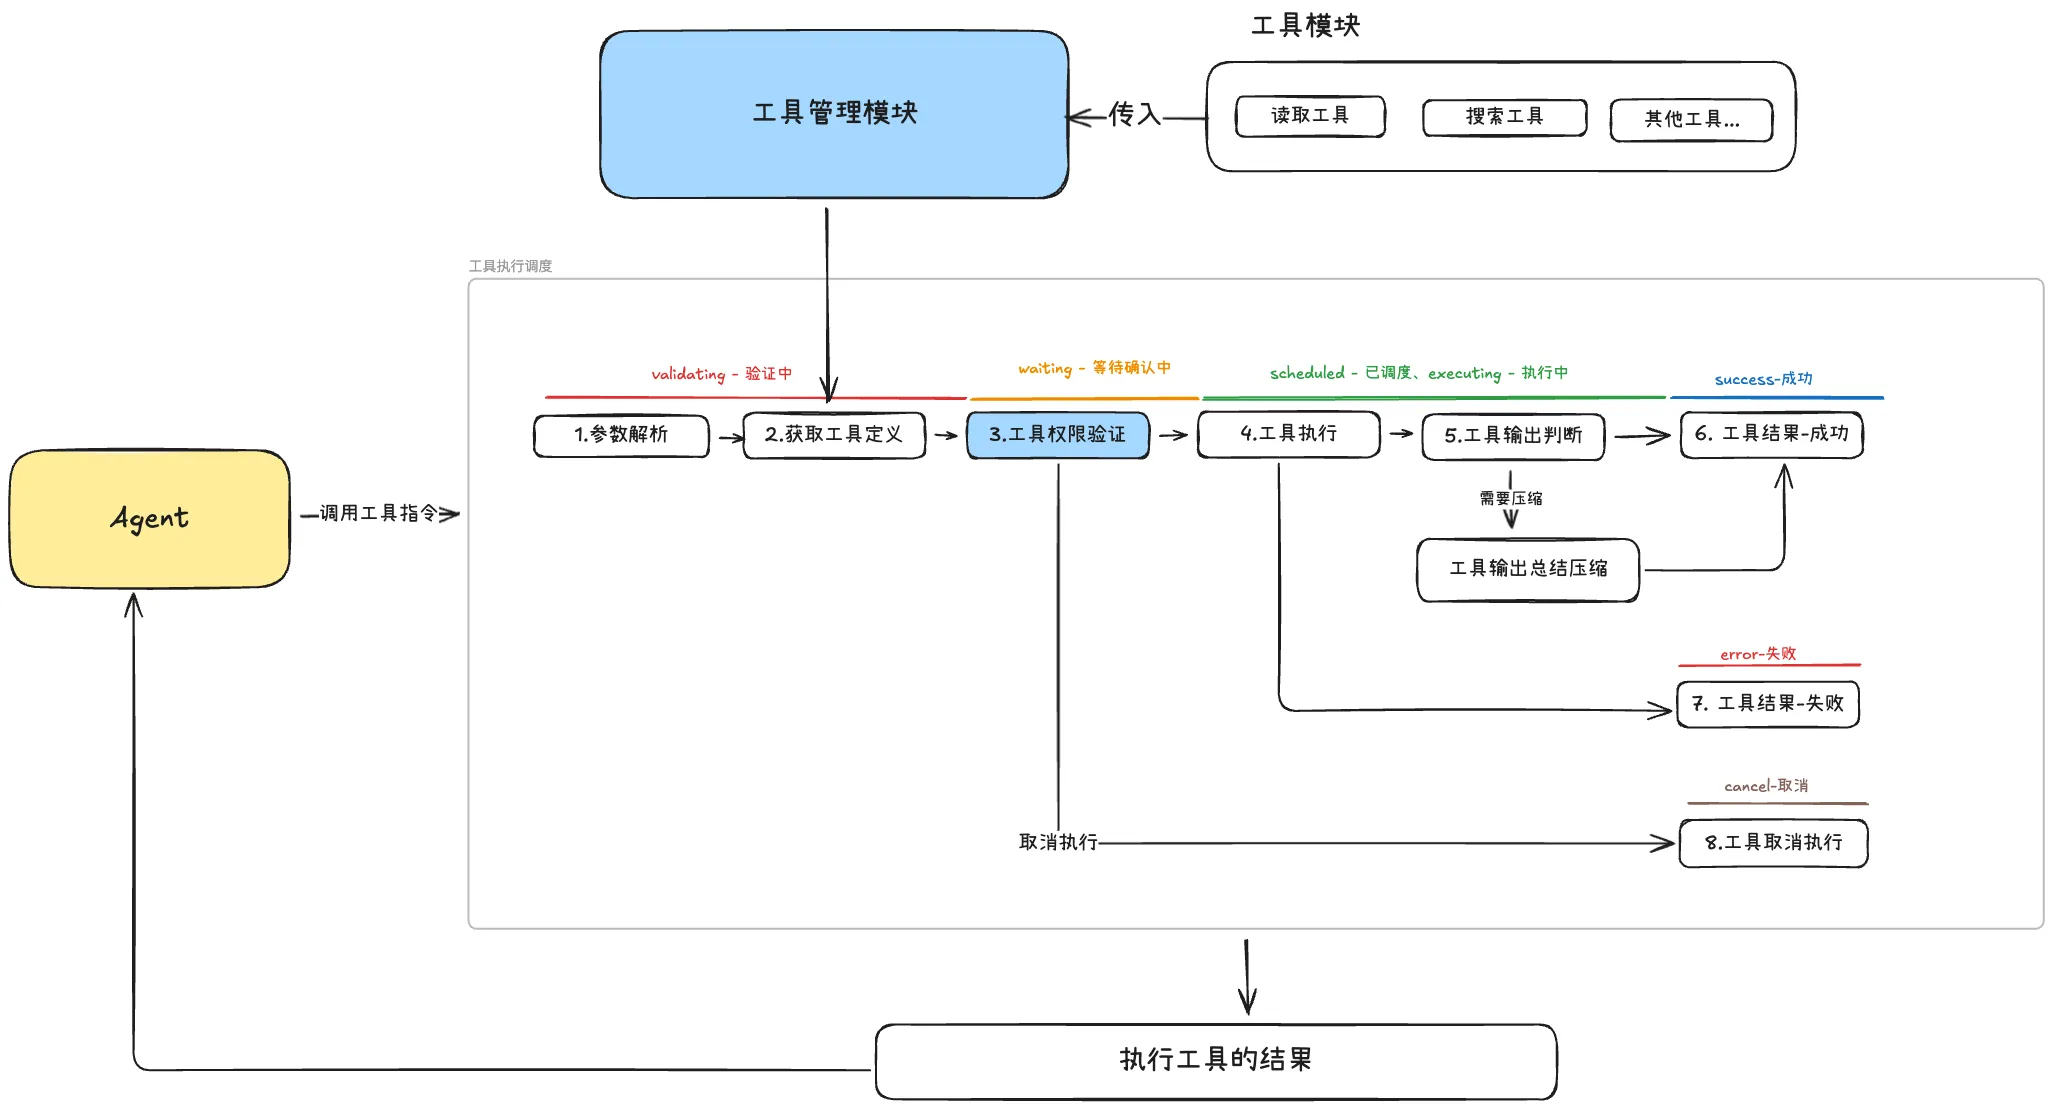
Tool execution states:
- validating: Verifying parameters and pre-conditions
- awaiting_approval: Waiting for user approval
- scheduled: Ready to execute, awaiting batch execution
- executing: Currently running
- success: Completed successfully
- error: Execution failed
- cancelled: User cancelled or process interrupted
2. Permission Verification Method Design
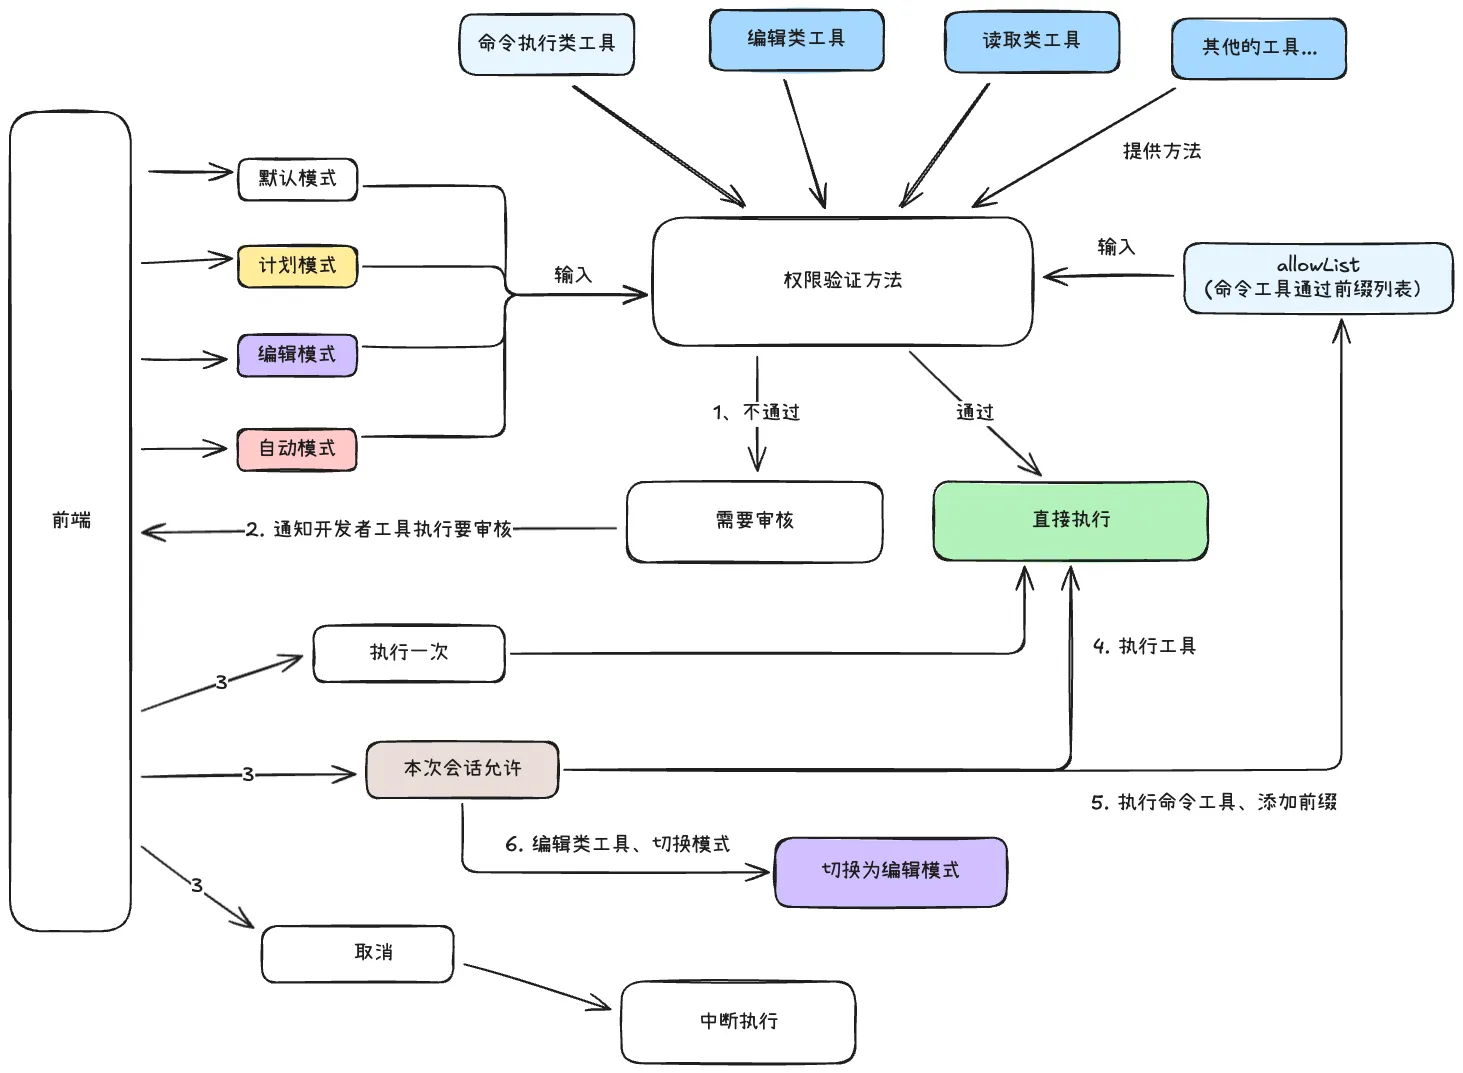
Four permission modes:
- Plan mode: Edit and command execution tools completely disabled
- Default mode: All tools available but require approval
- Edit mode: All tools available; edit tools auto-approved, command tools still require approval
- Auto mode: All tools available and auto-approved
Each tool has a verification function whose core logic:
- Get the current mode from frontend
- Determine if the tool needs approval based on mode
- For command execution tools, additionally check the allowList
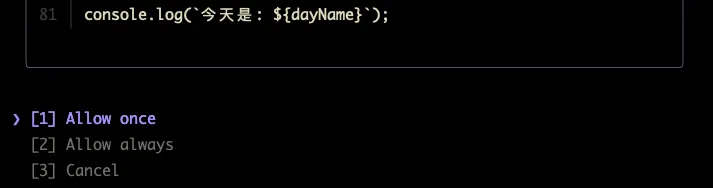
When verification requires approval, the user gets three choices:
- Execute once: Approve this single execution
- Allow for this session: Auto-approve all subsequent uses of this tool in the session
- Cancel: Deny execution
“Allow for session” behaves differently for two tool categories:
- Command tools: Use allowList to store command “prefixes” for future prefix validation
- Edit tools: Switch mode to “Edit mode”
3. Permission Configuration File Design
The built-in verification function approach makes developers active and users passive — users can’t customize individual tool verification behavior.
To improve this, flip the perspective: make tools passive and users active — users control tool verification via configuration files:
{
  "permissions": {
    "allow": ["Read", "Bash(git *)"],
    "deny": ["Bash(rm -rf*)"],
    "ask": ["Bash(npm publish*)"]
  }
}
ClaudeCode has 8 configuration sources (userSettings, projectSettings, localSettings, flagSettings, policySettings, cliArg, command, session) — permission rules from all sources are additive, not overriding.
Complete permission verification system:
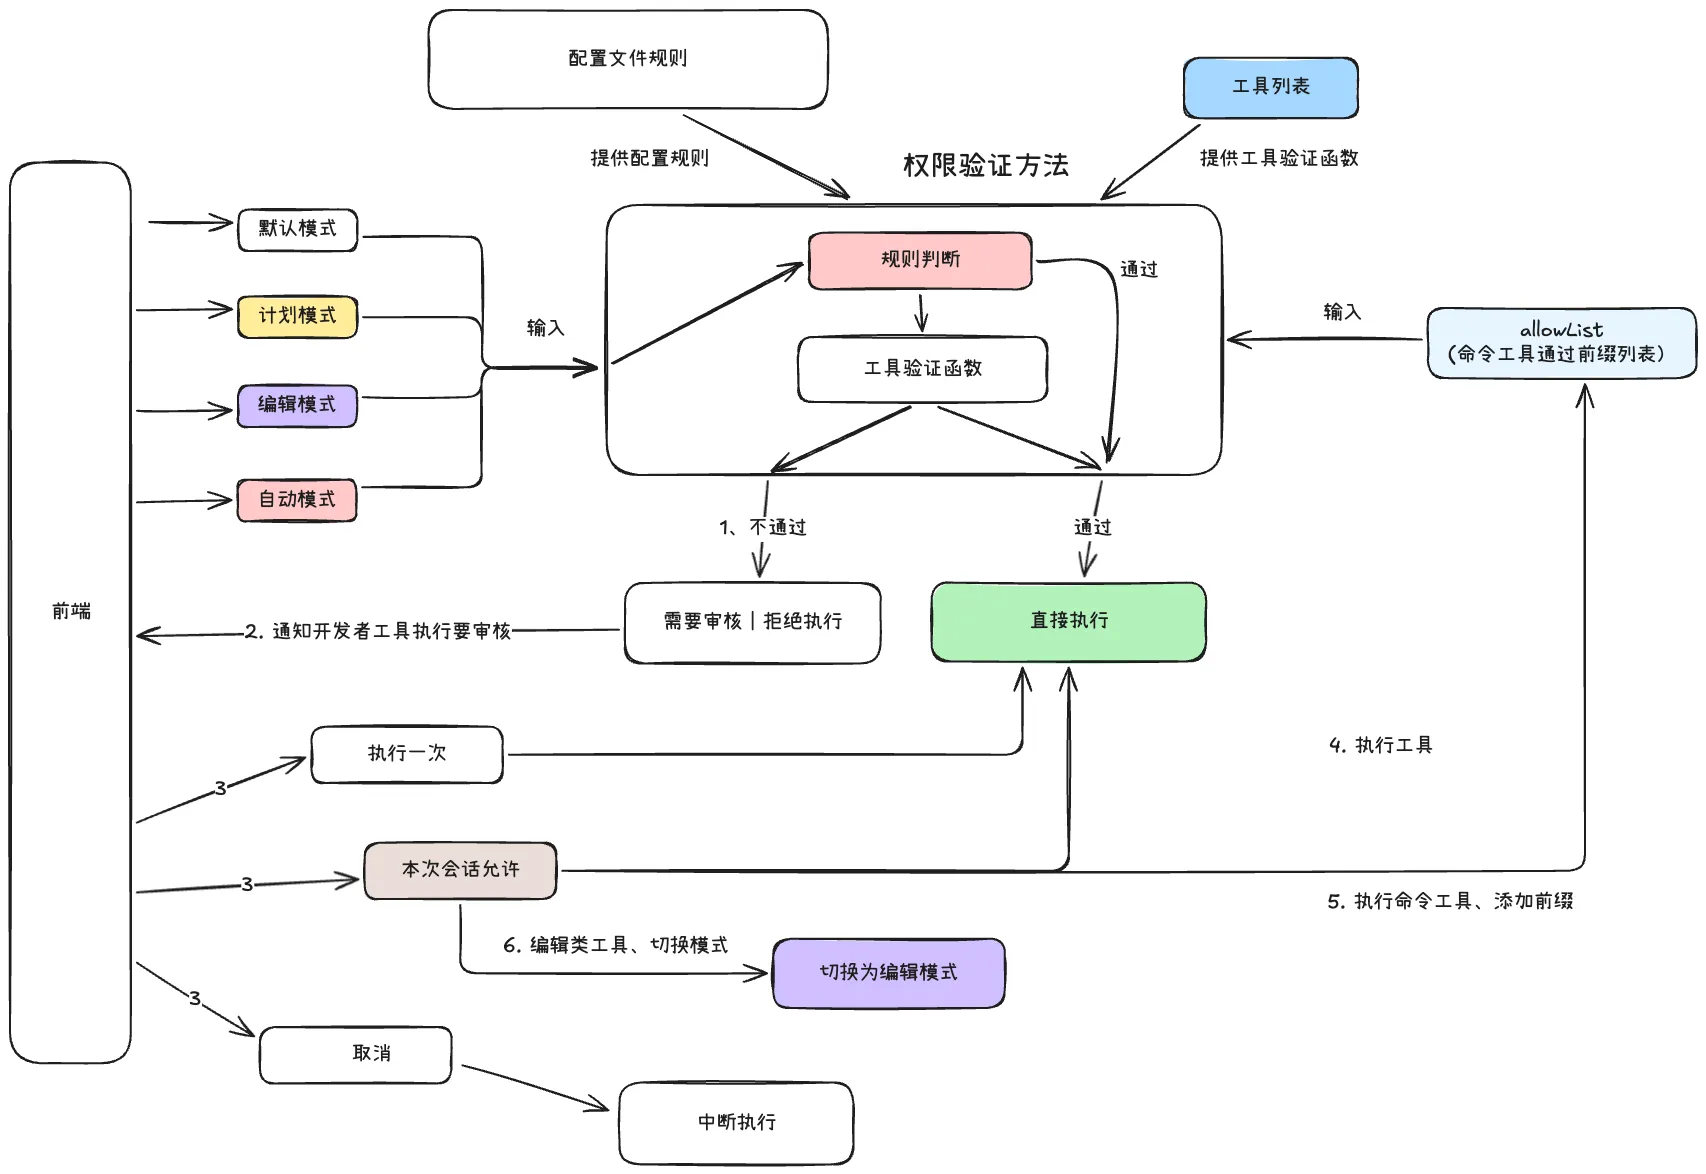
- Two-layer verification with priority: rule check first, tool verification function second. If rules pass, execute directly without further verification.
- deny (reject): Called twice — first at tool registration (matching tools aren’t registered, invisible to the model), second during execution-phase permission verification (necessary for dynamic tool loading or rule changes).
- allow (permit): Executed after the tool’s own verification function. When users configure allow rules, and the tool’s self-verification outputs “ask” or “passthrough,” allow silently overrides those states.
4. Terminal Display
Tool execution states drive CLI terminal displays using publish-subscribe event notifications:
- validating → show “waiting” status
- awaiting_approval → show approval panel for user selection
- executing → show execution in progress
- success/error/cancelled → display as tool execution results